

Hello my crafty friends & welcome! Our newest Gift Card Holder Die - With A Bow is such a fun & creative way to give a gift card. I wanted to create a blog post sharing all the ways I've added some "ribbon" onto my Gift Card Holder to make this "present" presentation (pun intended) feel even more realistic. Let's get into it!
Adding Ink
This first one is really quite simple - but there are a couple ways to do it! First, adding ink is obviously a fantastic way to create a ribbon, plus you can control how wide you'd prefer your ribbon to be.
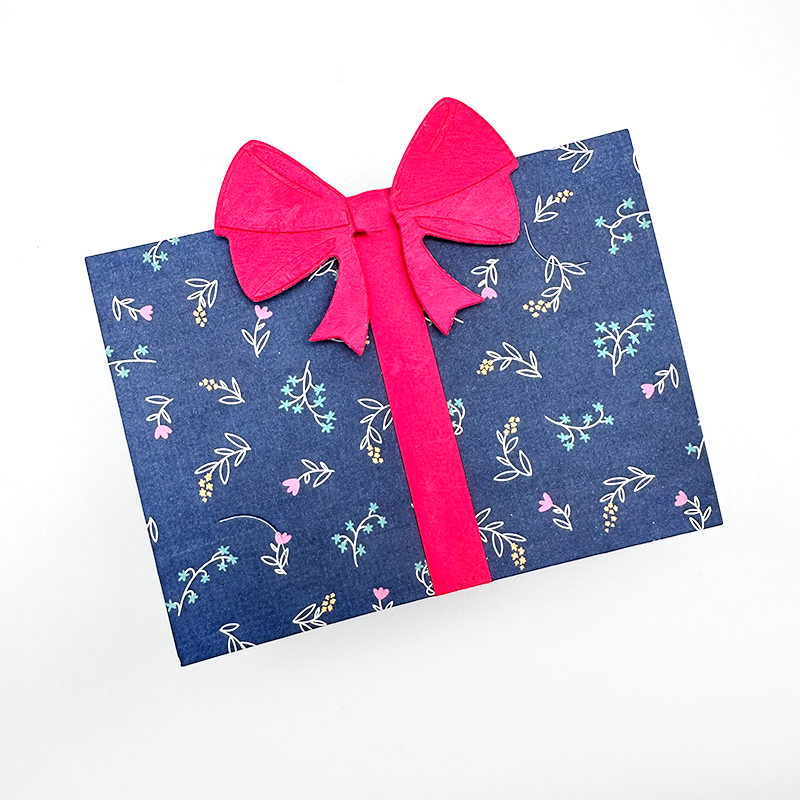
First Ink Technique: Direct-To-Paper
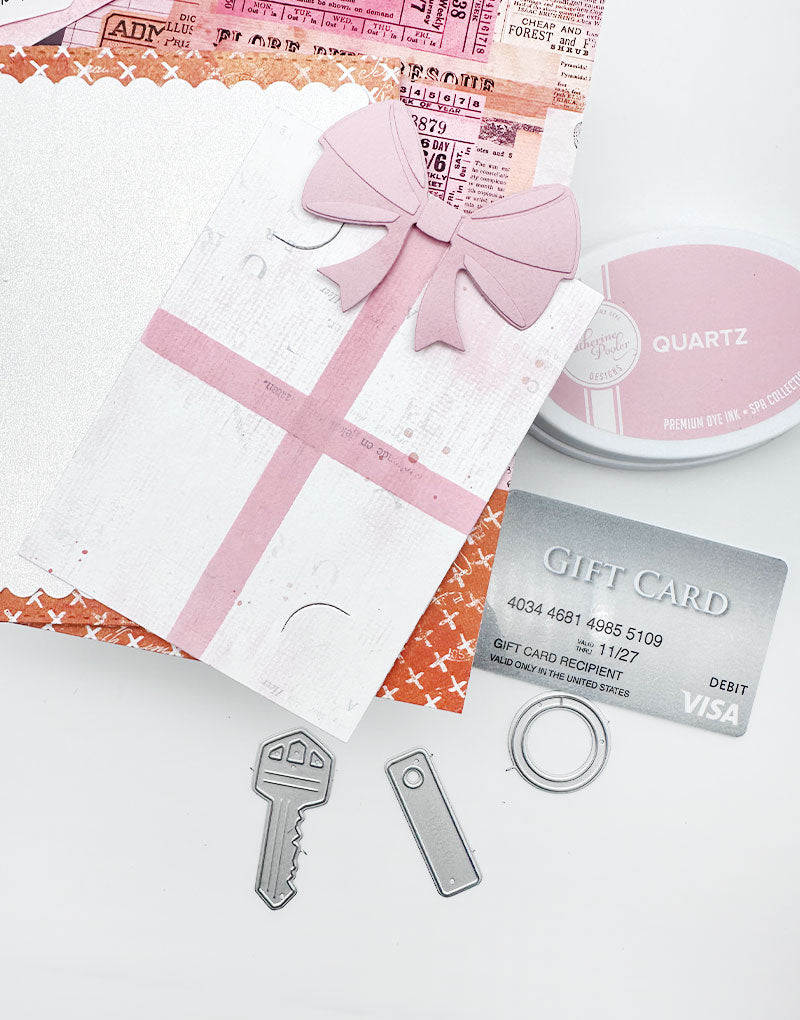
Direct-To-Paper is a technique I love using with my Catherine Pooler Inks where you press the entire ink pad down onto your paper to get a bold look. That's how I created my "ribbon" on the picture shown below AND also how I created my bow! This is a great way to make your own colored cardstock with just some white paper and ink. For this beautiful pink bow and ribbon, I used the color Quartz.
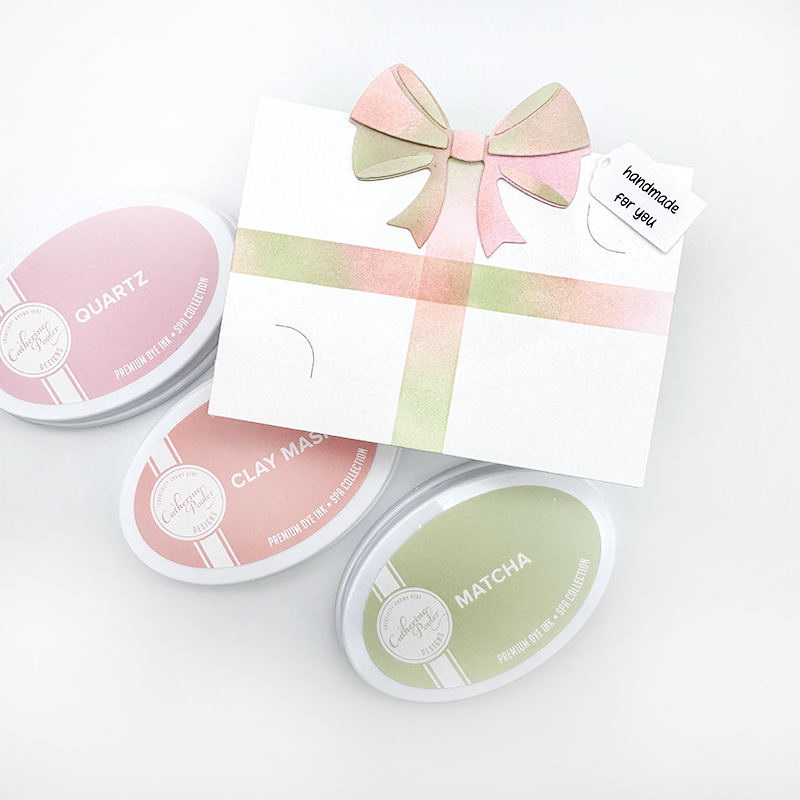
Second Ink Technique: Ink Blending
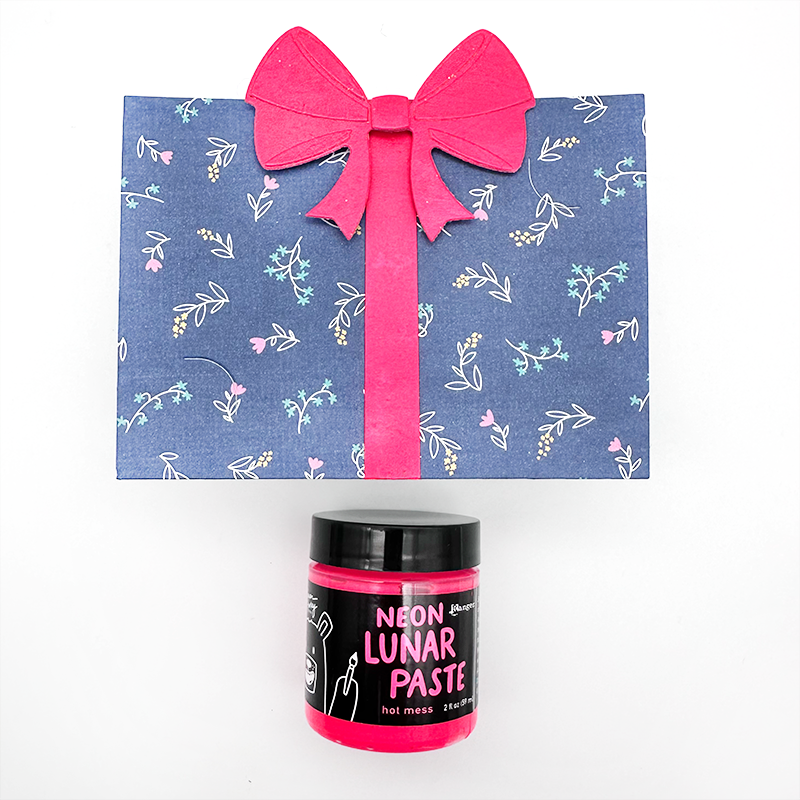
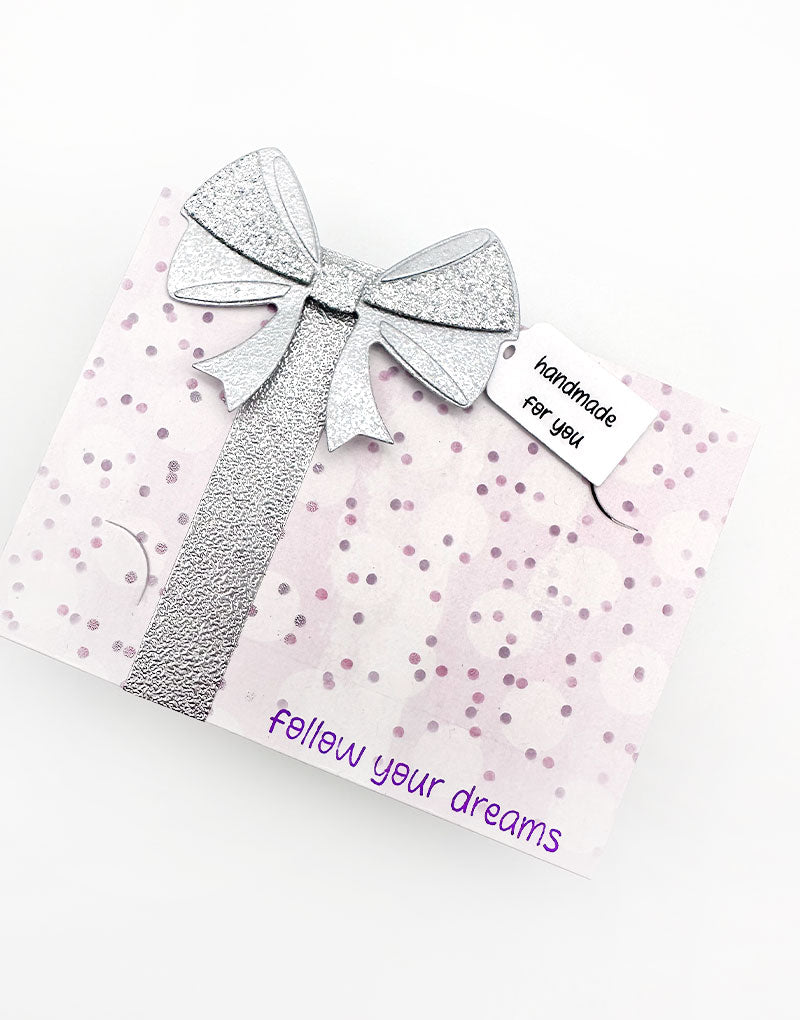
Texture Paste
It can be hard in photos to see the beautiful details & layers of the bow with the neon, but it's definitely there and has a beautiful pop to it!
Embossing Powder

Washi Tape
Washi Tape is the perfect way to add a little bit of decorative ribbon onto your Gift Card Holder because - well, it's already decorated for you! Not only that, but washi tape comes in all different widths, so you can find the perfect match for your "present." Washi Tape is known to be low tack (just meaning less sticky), and sometimes that makes it harder to stick onto cardstock. I've found the hack to this is to put the tape down on your cardstock before cutting out your Gift Card Holder. Running the cardstock with the tape already on it through your die cutting machine will add the needed pressure and closure to the ends of the tape!
Glitter
I know glitter sometimes gets a bad wrap, but I do love it. I know, it's messy. That doesn't bother me much. Did you know glitter can also stick to adhesive tape?? Check out this Gift Card Holder I created using that 1 inch width Cherry Tape again with some pretty green glitter. I like the look of this with some more fine glitter, but you could use a chunkier one if you'd like!
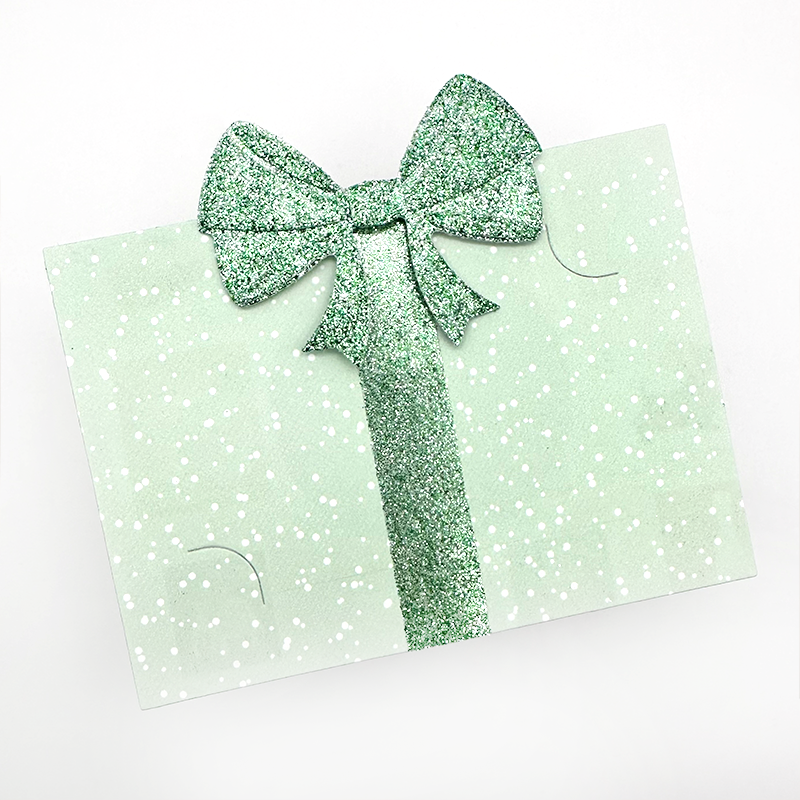
I'm swooning over these details! I couldn't help but think of how adorable this would be for Christmas with the green!

In order to get the excess off, use a dry paintbrush and lightly brush over the glitter adhesive. Something like a coffee filter helps with the mess here!
Foil
A lot of people assume I'm talking about hot foil when I mention foiling - but I actually don't have a hot foiling machine! (yet!) -- I've used one before, but this foil technique is a little simpler, and all you need again, is some adhesive & foil sheets! I used the 1 inch Cherry Tape again here, and then to apply the foil, you put it back side DOWN on the the adhesive, and rub it a little to add some heat so it transfers well. Then just lift! Here I used Dune Foil Transfer Sheets from TCW.
I also now have a short video showing how to apply the foil in response to a comment on this blog! You can find the video HERE.

I mean, look at that shine! I love it! For the bow I used some glitter cardstock in a similar shade with some plain cardstock on a couple of the layers to add that dimension.
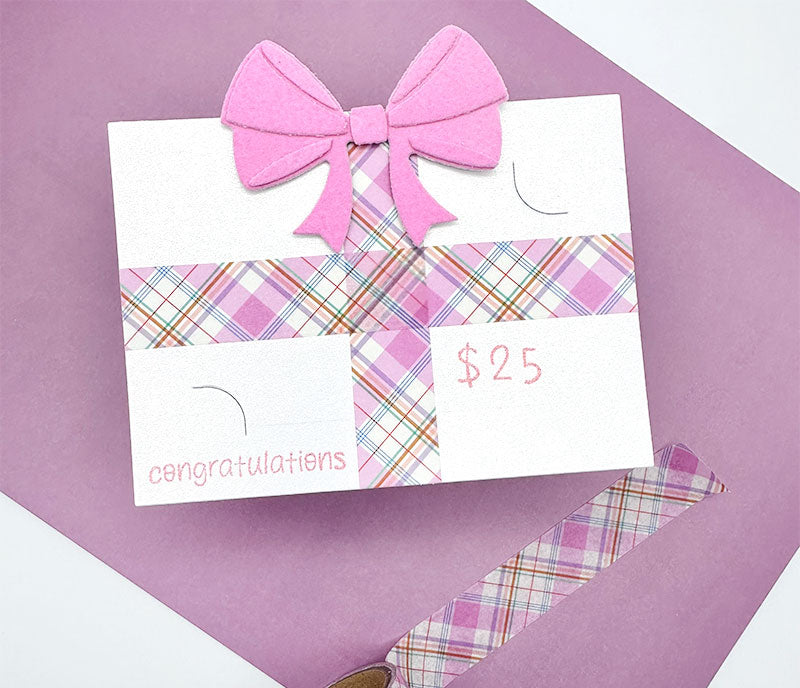
Actual Ribbon!?
What about some actual ribbon!? Scrapbook Adhesives by 3L has a Crafty Power Tape that can adhere some things such as -- you guessed it, ribbon! Check out my Gift Card Holder below to see how I used actual ribbon to create this awesome affect on my Gift Card Holder!
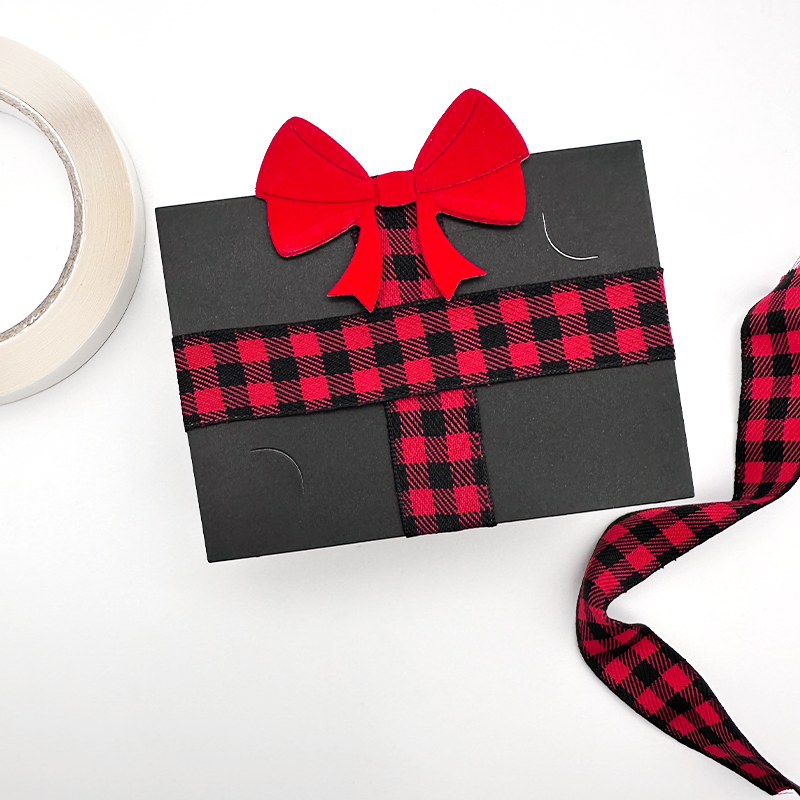
I love this plaid ribbon I had in my stash and how fun is this technique? You can use any ribbon you have! You could even use some satin ribbon which would look even more like a present.
Patterned Paper
This last technique is less to do with the "ribbon" look and more utilizing any patterned paper you have on hand that looks like wrapping paper! I had some of this really lovely gold patterned paper in my stash and knew it would look amazing with another gold bow.

There are even more ways we can decorate our Gift Card Holder Die - With A Bow, but I hope this blog post provides you with some different techniques to add that "ribbon" effect. Let me know in the comments which one is your favorite & which one you are going to try first!
With Heart,
Disclosure: Compensated affiliate links may be used above at no cost to you. I only show you products from companies that I believe in and purchase from personally. Thank you for supporting me so that I can continue to bring you lots of fun crafting content!


Shelli
Feel free to do a video on the foil option – I haven’t worked with foil before…