

Hi crafty friends! Today is the Joys of Spring release day for Catherine Pooler, how exciting is that!? I typically am a big fan of the winter & cold, but I am more excited this year for the beautiful Springtime & I couldn't wait to share this lovely spring filled card with you that I've made. I did one of my favorite techniques, stamping my own background! Below is a full process video of this card, make sure you subscribe on my YouTube Channel if you haven't yet to see all my card making techniques!
The first thing I will mention, the reason this really is made so simple is because of the Misti Stamping Platform. I have a separate blog post going into all the ways to use the Misti if you are interested as well! The Misti allowed me to place the stamps in the correct place to make a pattern, that almost looks like a decorated Easter Egg! Since these stamps were shorter, this was a must so I could create straight long lines that covered the whole base of my card.
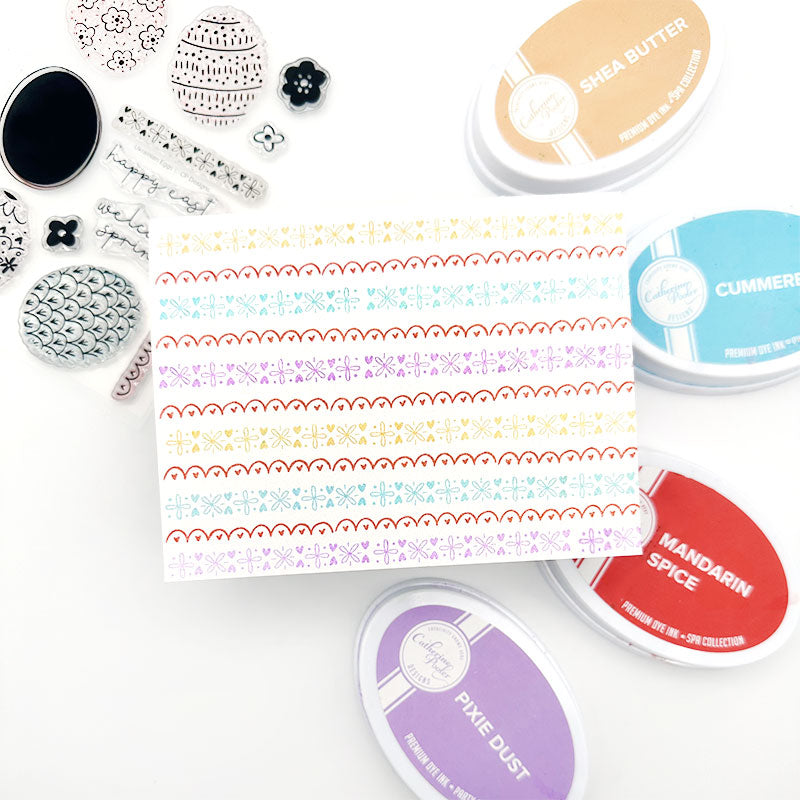
Today, I am using the four colors, Pixie Dust, Mandarin Spice, Cummerbund & Shea Butter. These form a triad color scheme on the color wheel. Don't forget to get your FREE color wheel! It really does help when putting together color themes for cardmaking, scrapbooking & more. I really loved all the little details on these striped stamps. I decided to keep the scalloped heart stamp the same color, with Mandarin Spice, and then switch between the other 3 colors to add some variety.

I knew I wanted to add something more to the background, more than just my sentiment, although I love this stamp set because it can be used for either the Easter holiday, or just for Springtime in general! I decided to grab the flowers in the stamp set, and use the Shea Butter, Pixie Dust & Cummerbund to make some flowers to add to the outside & inside of my card. I also used the A2 Liner Die in our Card Sentiment Dies to create this beautiful border in Pixie Dust before adding the smaller scalloped lining. I just love that Pixie Dust color!

I made my flowers and then used the coordinating die cuts to cut them all out! I then used some sequins to put as the "middle" of the flowers. This felt like it added even more differentiation between my background colors, and the flowers. I also added some foam squares so they'd pop even more. I like adding something like flowers in clusters, grouped together and layered. It adds an interesting design feel.

What's great about this stamp set, is that our Card Sentiment Dies coordinate perfectly with it! And the words in this beautiful stamp set don't have coordinating dies (just the flowers and eggs) which is perfectly fine since we have our versatile Card Sentiment Dies (for this reason)! I used our rounded stitched edge rectangle to stamp "welcome spring" in that bright beautiful orange. I felt this Sentiment Die worked perfectly for adding a little bit of lightness onto our busy colorful background.

I hope you enjoyed this card! Don't forget to shop the NEW Joys of Spring Collection with Catherine Pooler! You can also get these stamps in a perfect Bundle here. Can't wait to create more with this collection!

With Heart,
Disclosure: Compensated affiliate links may be used above at no cost to you. I only show you products from companies that I believe in and purchase from personally. Thank you for supporting me so that I can continue to bring you lots of fun crafting content!


