

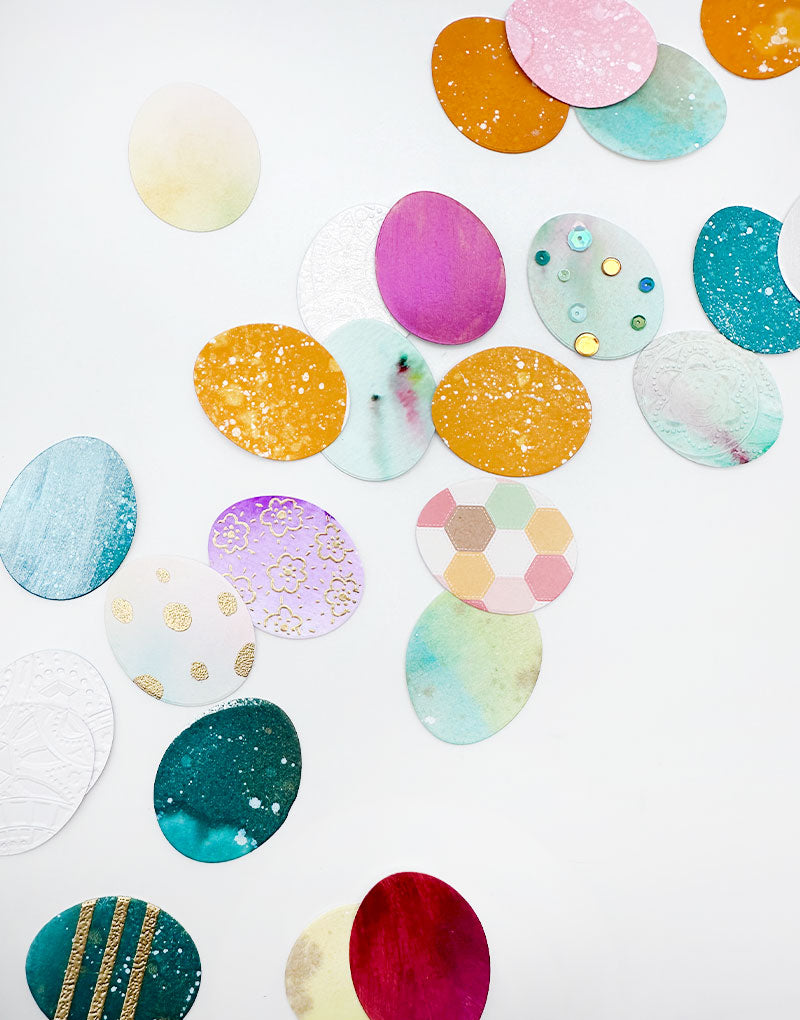
Hello everyone! Today I am getting into the Spring spirit and sharing 15 different techniques on making your very own paper Easter Eggs. These are so fun to make and I can't wait to share all the ways I did this with you! Check out the full process video below to see them all in action!
1. Direct to Paper: This just means pressing your ink pad down onto your paper in order to get the deepest color of the ink. I typically do this with Catherine Pooler Inks because they are so juicy, but you can do this technique with others as well!
2. Lunar Paste: Painting Lunar Paste onto your paper allows it to dry quicker and gives you a look like you cut something out with specialty paper. This is one of my favorite ways to use Lunar Paste!
3. Water Splatter: Catherine Pooler inks are water reactive, so when you hit them with a little water, you will be sure to see the result. I love doing this with my inks!
4. Paint Splatter: Very similar to water splatter, paint splatter came right to mind when making Easter Eggs because it reminded me of a robins egg! This technique was so fun & one of my favorite looks.

5. Water coloring with your inks: This is a given! I felt water coloring had to happen because that's truly what an Easter Egg is! If you are new to this technique you can find my blog here showing all the ways to use your Catherine Pooler inks. You can watercolor with any ink as long as it's water based.
6. Adding Mica Spray: Tim Holtz has a 3 pack of Mica Sprays I've had for a long time and LOVE. My favorite is the broze/copper one, it adds a shimmer I adore and use on a LOT of my crafts.
7. ColorSparx: My most recent blog post goes through the basics of how to use ColorSparx! This is just another type of watercolor that gives you amazing and vibrant colors, perfect for an Easter Egg!

8. Ink Blending: This is a classic! I love how just simply ink blending some colors onto some cardstock gave an Easter Egg vibe.
9. Patterned Paper: This idea came from Catherine Pooler herself! Just simply find a pretty spring patterned paper you love, and cut out your eggs that way!
10. Using an embossing folder for texture: I don't have many embossing folders, this one is a Mosaic one by Sizzix and I adore it. I love how this added some texture and depth to my Easter Eggs!
11. Ink blending on top of the embossing folder: Once you run it through the embossing folder, then try some ink blending on top! This allows the texture to POP even more!

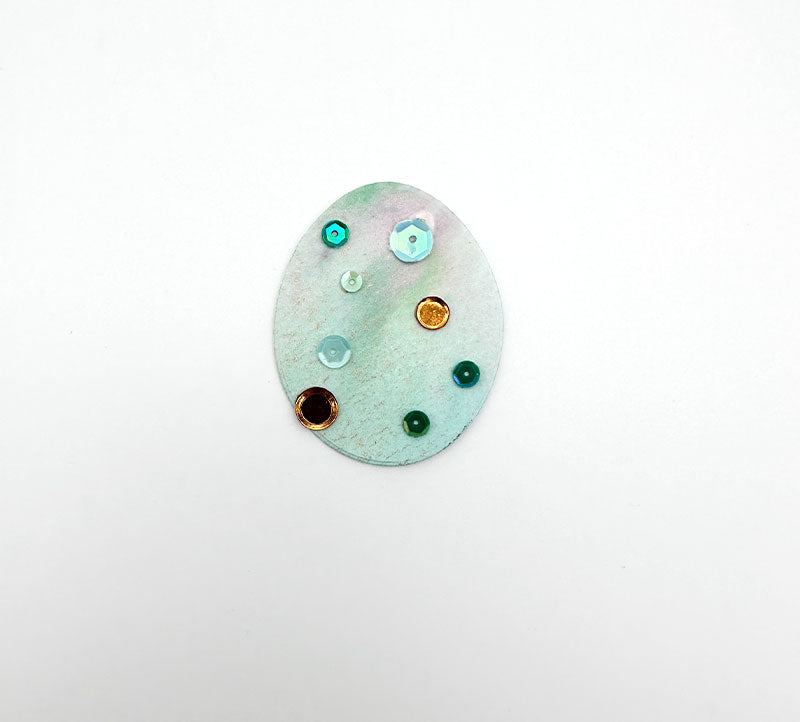
12. Add sequins! Add some bling to your Easter Eggs! Why not spruce them up and add some sequins! I love Catherine Pooler Sequins because she does have a variety of colors and sizes, making it fun to mix and match.
Using Embossing Powder 3 different ways

13. Adding adhesive strips with embossing powder or glitter: I LOVE doing embossing powder this way. This is a great way to add that shine without needing any fancy ink! Here I used 1/8 inch Cherry Tape.
14. Embossing powder with the Ukrainian Eggs Stamp Set: This is the most classic way to use embossing powder. Grab your VersaMark & grab a stamp, preferably the decorative egg one, and add those lovely details.
15. Using an Embossing Pen to add your own details!: Using an embossing pen is not something I do often, but I do love having this option. Embossing pens allow you to add your own detail, I use this often with ephemera, but look how adorable that polka dot egg turned out?!
I hope you loved all the ways I made these adorable Easter Eggs & inspires you to create as well! I can't wait to create some cards with these.
With Heart,
Disclosure: Compensated affiliate links may be used above at no cost to you. I only show you products from companies that I believe in and purchase from personally. Thank you for supporting me so that I can continue to bring you lots of fun crafting content!


