Hi crafty friends! I am very excited to share this fun technique, using some Scrapbook Adhesives by 3L product to make your card making SO much more simpler. Below you will find a full process video in how this beautiful card came together.
If you want to learn how to use your Adhesive Sheets to create your own glitter paper, you can check out my short video HERE!
Alternatively check out how you can use your Adhesive Sheets to create some stunning foil bow pocket cards HERE!
Unfortunately, it's that time of year where people are getting sick! Ick. But, the best feeling in the world is getting a handmade card in the mail, especially if you aren't feeling well! I decided to make this 'feel better' card but really wanted to add more of a flair to the background of my card. I had some scrap paper that I've been meaning to use for a while, and decided to cut them down into strips. It wasn't important to me the width of my strips, I just decided to trim them down.
I've seen these techniques before, but typically people use tape strips or glue to individually adhere each piece and I was like---nope. Not doing that! But then I found Scrapbook Adhesives by 3L has Adhesive Sheets, and I knew this would work perfectly! First step, peel the backing off the Adhesive Sheet and place onto a scrap piece of cardstock. Then peel the backing off again, revealing the sticky part. Now time to place your strips!

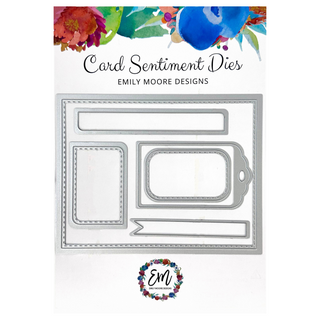
You can do any pattern you like, I chose diagonal, but you could even do the herringbone technique I've seen a lot of people do as well. Once you have all your strips down, trim the sides off. Next, I used the A2 Liner Die in the Card Sentiment Die pack to cut out a perfect card base!
Because the background is so busy and fun, I decided to keep the rest of the front of my card nice and simple. I ink blended Simon Hurley Rosy Cheeks Ink on some more scrap white cardstock. Here is another way I used those adhesive sheets! I put an Adhesive sheet on the BACK of my inked cardstock, and before peeling the backing off, I die cut out my letters! This essentially creates a sticker. I wanted to do it this way so there would be no leftover residue on the backing of my letters.

I decided to cut the background of the word die out in vellum, and with my letter "stickers" I don't have to worry about any residue getting onto my vellum at all! Once all my letters were placed, I put micro foam squares on the backing, covered by each letter in order to adhere onto the front of my card. They were covered by the letters so it added a nice dimension as well! I adhered my card panel I created onto the light blue paper from our A2 Card Base paper pack.
For the inside of my card, I used one piece of patterned paper, tour it a little bit to roughen the edges, and then some white cardstock to stamp my sentiment on. I used Simon Hurley's Rosy Cheeks again to coordinate with the front of my card. For the bottom half, I used the blue patterned paper and cut out a strip and adhered that onto some white cardstock before cutting it out with the A2 liner die. This adds a nice decorative touch to the place where you write your sentiments!

I finished the inside and outside of my card with some beautiful sequins from Catherine Pooler, a mix actually! I used some pinks from the Libson sequin mix and some gold and light blues from the Bogota sequin mix. This card was a lot of fun to make, I may do it again, but a different pattern! What do you guys think!? Let me know in the comments!

With Heart,
Disclosure: Compensated affiliate links may be used above at no cost to you. I only show you products from companies that I believe in and purchase from personally. Thank you for supporting me so that I can continue to bring you lots of fun crafting content!


