Hi friends! Today I have a fun educational blog post all about Simon Hurley's different texture pastes! Simon Hurley's main brand of texture paste is called Lunar Paste. If you've never used a texture paste before, think of it like a thicker consistency of paint, something you use with a pallet knife to spread across stencils to give you more dimension and add texture to your projects!
Below is a full video where I create a swatch showing the 4 different types of pastes Simon currently has on the market. This video is longer (over 30 minutes) because I also go through the difference between each as well as some fun techniques of how to use the different pastes! Grab some coffee or tea, and let's get into it!
Lunar Paste: Lunar Paste was the first type of texture paste Simon Hurley came out with. Lunar Paste is my favorite, coming in beautiful colors & hues that make mixing & matching your favorite colors even easier. Lunar Paste is made with mica powder which just means it adds that shimmer & shine to the paste, making it more beautiful & unique than others on the market! It's also important to note that Lunar Paste is opaque, meaning you won't be able to see through it - it's not translucent.
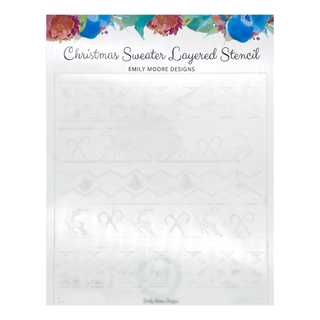
The most obvious way to use any of these lovely pastes is to run it over one of your favorite stencils. Here's some Breakup Blue on the snowflake layer of our Christmas Sweater Layered Stencil.
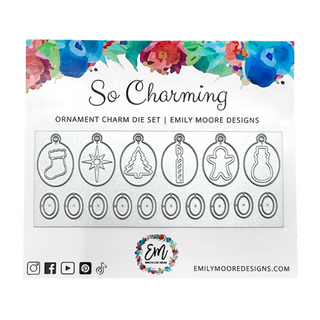
Another great way & one of my favorite ways to use Lunar Paste is to use your finger to rub onto your paper to create that shimmery effect, once dried - run it through your die cutting machine! This is exactly how I use the Gold & Silver Lunar Paste with our smaller charm dies on our Ornament Gift Card Holder!
Do you prefer the gold or silver?
Doing the same technique on an embossed background is another fantastic way to create an easy yet stunning background. This allows the textures of the embossed image to show up even more, creating a lovely base for a nice large word die, don't you think?
Solar Paste: Solar Paste was the next to come out & you will notice the main difference right away. ALL Solar Paste colors are a white paste base with a shifting mica. This just means when you tilt in the light, you will see the color shine through, but it's generally a white paste or clear if you apply it thin enough. I find Solar Paste to be most effective & impressive on black paper. It reacts really well with the black, especially in a thin layer, you can really see the shine of the color.

Tone-on-Tone: On the other hand, if you wanted a more tone-on-tone look, you can apply this with your finger on some white cardstock to add that surprising shift of color when the light hits it. This is great if you don't want the focal point of your card to be the background, but instead something else!
Die Cutting: Another fun way to use solar paste is to add a little dab onto your finished die cut embellishments (think the center of flowers, leaves etc.). Below you will see a leaf I had previously created, and then I added a thin layer of the Solar Paste in Royal Flush, which gives a purple tone when shifted in the light. This really adds to the autumn feel!


Ink + Solar Paste: This is my FAVORITE way to use Solar Paste. What's so neat about Solar Paste is that it can take on other colors because of that white base. So, you can use your ink through a stencil like you normally would, then once the ink dries, apply a layer of Solar Paste. Be sure to use a similar color, for example, in the below photo I used Simon Hurley triple berry ink first through our Snowflake Stencil, then I applied a layer of the Royal Flush Solar Paste. Look at that SHINE!! I just love this technique. The more the Solar Paste dries, the more of the ink color it'll take on. This is because his inks are water base & water reactive, so they react to the paste once you put it on. How fun is that!?
Neon Lunar Paste: Simon's Neon Lunar Paste is unique because it ALSO has that mica in it. It's a neon pigment to make the colors fluoresce & be super bright & intense, just like you'd think of neon! But that mica also adds that shine. I find the Neon Lunar Paste works beautifully with our Confetti Layered Stencil, for obvious reasons!
Neon Lunar Paste is also opaque (meaning you can't see through it) so it looks fabulous on both white & black cardstock. You can use it with your finger as well to rub on cardstock to get more of a "highlighter" feel. Check out below to see the party effect with the Neon Lunar Paste + Confetti Layered Stencil!
Astro Paste: The most recent paste Simon has come out with is Astro Paste. When you think Astro Paste - think glitter! But don't fret! If you are someone who doesn't love glitter, I'm telling you - this paste is for you. Astro Paste as of now comes in 9 beautiful glittery colors (2 of which we have in stock!). It comes in a milky consistency, and you won't see all of the glitter out of the jar. It has a nice thick quality just like Lunar Paste so it's easy to apply through stencils - and when it dries is when the true magic happens!
PLUS - for my non-glitter people, this glitter DOES NOT rub off! At all. This is something Simon did purposefully because obviously it is a pain when you work so hard on a card or project, only for the glitter to come off in the recipients hands. This is NOT the case with Astro Paste. I love the thick consistency & I LOVE the way it looks with our Christmas Sweater Layered Stencil. Because of the thickness & quality of this paste, I can get all the little details of our Christmas Sweater Stencil. Check out our reindeer & candy canes with the green Astro Paste on BLACK cardstock.
Here's an end result of a background I created with both the Green & Red Astro Paste (later gator & bee sting) which are both in stock in our shop today! I also applied a layer of Gold Rush Lunar Paste to tie it all together. Astro paste takes a little longer to dry - around 30 - 40 minutes, but it can be heat set (just make sure to apply even heat to avoid bubbling).
What do you think of all these different pastes? Which one will you try out first? Let me know in the comments below!
Also, if you want to learn even more about all these wonderful pastes, be sure to check out my crafty friend Simon Hurley!
With Heart,
Emily


Brenda
Thank you for the excellent description and uses of these beautiful Simon Hurley pastes. The photos really bring them to life~
Jayne
Thank you!! This was so helpful!
Susan Corn
Great explanation of the pastes! I love all of them and I know a few different ways to use them. They are gorgeous. Thanks 🤩