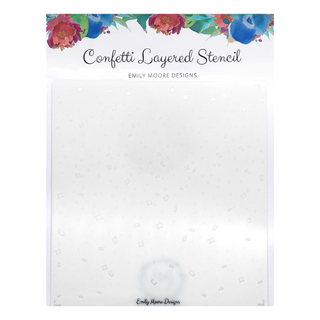
Hi crafty friends! One of our most popular products (beside our beloved Gift Card Holder Die) has become our Confetti Layered Stencil. Because of that, I wanted to give a breakdown of how simple it is to use, as well as show off the different layers using different mediums. Let's get into it!
Ink Blending
The most common technique would be using
inks. I love using
Catherine Pooler inks with my stencils, they are nice and juicy - and you can buy them with their
refills so you never have to worry about running out! All you need for this is some ink pads, and some
blending brushes. I like to go over my stencil a couple times to get a nice, dark look. Sometimes it takes going over a couple times to get your desired look. I designed this stencil to have 3 layers, so you can use 3 separate colors, and make a fun party background for your cards!
Check out the separate layers below - notice how you can use the polka dot layer on it's own!
Ink Colors Used:
Texture Pastes
Texture paste is sort of like a thick paint. You use a pallet knife to smooth it on over your stencil. I've found that a nice thin layer works best to not "smudge" any images through your stencil. It takes some practice, but is totally worth it!
Here I use Simon Hurley's Lunar Paste, which is just one brand of texture paste. I love the thickness of this paste. I used two Neon Lunar Pastes & one regular Lunar Paste. The Neon Lunar Pastes add a ton of vibrant color, perfect for confetti! What's fun about the layers to our Confetti Stencil is that you can mix & match all these mediums, which I've done before & love. So--for example, if you didn't want to wait too long for the texture paste to dry, you could use ink for the first two layers, then add some texture paste to the last layer to make it pop!
Lunar Pastes Used:
I love how this first layer of yellow polka dots against the black cardstock reminds me of a bee or a bee themed card would be a lot of fun! I also felt like a silver/white texture paste would be really pretty against the black to look sort of like a starry night.
Texture paste like this is also a great way to utilize your stencil with a black background.
I just love how that final layer of streamers really brings the confetti to life!
Foil
When I say foil, I DO NOT mean hot foiling. A lot of people don't know you can use foil this way - just with some paste! You can use
transfer foil sheets and some
Tacky-When-Dry gel with your stencils to add some awesome shine! And now, we sell a
Foil Transfer Kit in one easy bundle so you can try this technique without having to shop elsewhere! I have a separate full video all about this process
HERE.
How Do I Clean My Stencils?
This is a great question that I get asked very often! Cleaning your stencils is easy to do, make sure not to leave them with any paste or gel on them or else it will stay that way and be very hard to get off! But we've all been there. So the easiest way to clean your stencils is right away! Here's some tips for each medium we discussed above:
Ink: Just rinsing under water will wash the ink away! Be careful not to use a permanent ink (if you do, it's okay!) - it will just stain your stencil, but it won't ruin it or bleed into your other projects, as long as you rinse it under water! Then just pat dry with a paper towel.
Texture Pastes: It's important for mediums like texture paste to rinse your stencils off right away, or else this will stick to your stencil & be very hard to wash or (or never come off!). Again, this is one that isn't going to ruin any of your other projects, but if you rinse it off right away, you won't have to worry about it! I like to use my fingers to rub any of the excess paste off my stencil with rinsing under the water. Then again, just pat dry with a paper towel.
Tacky-when-Dry Gel: It's extremely important to note that when using Tacky-when-Dry Gel, you will want to remove your stencil from your cardstock
immediately after applying the gel to your stencil. This is basically a glue & it will stick to your stencil and possibly your cardstock & ruin it. The same technique works here though, rinsing with water & your fingers to get all the excess off. It's really important to get all the excess tacky off, or else -- like it says, it will dry tacky! On your stencil. Then drying with paper towel is the same trick!
Basically the moral of the story is, rinsing with water right away helps to sustain the longevity of your stencils!
You can now grab our
Confetti Layered Stencil in a selection of Bundles today! I'd love to see what you create with our products, make sure to tag me @emilymooredesigns with anything you create!
Happy Crafting!
Emily
Disclosure: Compensated affiliate links may be used above at no cost to you. I only show you products from companies that I believe in and purchase from personally. Thank you for supporting me so that I can continue to bring you lots of fun crafting content!


Bambi
I just received my new stencil and am excited to try it out. I’m new to stenciling and was curious what you recommend to clean your stencil after use?
Janet Castle
This is a wonderful stencil set and love that I can use one layer or more!!! Just ordered it!!!!
Thanks so much for the inspiration!
Debra
I absolutely love this! When will the stencil be back in stock?