Author: Emily Moore
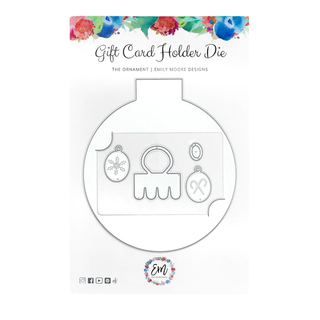
Hi my lovely crafty friends! One of my favorite things to do with our Gift Card Holders is to put them into pockets inside of cards. You can of course gift them as is, or if you are talking about the Ornament, hang it on a tree! - but in case you'd like to gift someone something extra special this holiday season - I've got you covered! Today I am going to be sharing how to make an A6 sized card. This card gives us the perfect amount of length for The Ornament (plus topper) to fit into, plus a handmade pocket that I promise - is simple to make.
Here is a full process video if you prefer to follow along that way! Otherwise, step-by-step photos are below!
First, let's talk about the A6 card base. You will start by scoring & trimming your paper down to 9 inches by 6 1/4 inches. On the 9 inch side, score at 4 1/2 inches: this will be where we fold in half!

Now, let's talk about this pocket. Because the Ornament is pretty wide (4 inches), it needs that entire half of an inch on our card base for the pocket. Instead of making the pocket like I normally would, by trimming some paper to the width of the cardstock, I needed to create some flaps so they would fold inside, and the Ornament would still fit. Below is graphic I created to help me remember all the little lines on the ruler, hopefully it helps you too!

Start by trimming your chosen cardstock to 5 inches wide. The length/height of the pocket I trimmed around 3 inches but ended up adding a decorative strip that made it 4 inches total. If you want the entire gift card & Ornament to be covered, make the length 4 inches. And don't worry - you can still see the adorable topper & charm peeking through the top!

Now, you will score 3 sides of the paper at ¼ inch, this will create our flaps. From here, you will diagonally cut each corner so you can easily fold the flaps in without much overlap. Feel free to add a decorative strap to the top of your paper! See the images above & below for more clarity!

Flip your pocket over to the back side, and fold your flaps inward. Then, place 1/8 inch Extreme Double Sided Tape onto your flaps. To place on the inside of your card, you could use your score board corner edge to be sure it lines up perfectly. Now remove the backing from your double-sided tape, and carefully place onto your card base! If you’d prefer to use glue here, feel free – this may be a nice option if you are nervous about lining it up perfectly. Be prepared to either hold down your pocket or put something heavy on top of it while it dries so it stays put.
Making a pocket this way provides more room & also a little dimension, you will notice your card has a little spring to it, which is perfectly fine. This makes it a great gift for giving in person! Just image the expression on your loved ones face when they open this card, and inside is an handmade paper Ornament with a gift card in it to their favorite restaurant/store/shop, etc.! They will love it!
So that was basically the hard part, which – wasn’t too hard at all right?! I still wanted to provide you with more measurements in case you’d like those for this type of card. To create a nice frame, or card base for the front & even inside of your card, trim some cardstock down to 6 inches by 4 ¼ inches. This will give you ¼ inch of space between your card base & your decorative paper.

I also did the same thing for the inside half of my card, then added a white base that was only 3 inches by 5 inches, so there is still a little space to write. I added a little saying on the top part as well!

Now the fun part, decorate! For the front of my card, I used a decorative square from the paper pack & that worked perfectly. I always love decorating & creating cards with just paper. It’s completely possible & that was how I started out! I just love the way this card turned out. Now you have an option to gift your Ornament Gift Card Holders inside of a card!


I hope you love this & I hope you try this for the holidays! Let me know in the comments if you do!
xoxo, Emily


Sarah Seid
I so appreciate how comprehensive you communicate how to make this card.