Add some shine to your cards with some metallic flakes! Have you ever used these before? They are SO fun and add some nice shine & texture to your cardmaking! This technique is simple, yet looks so impressive! Let's test it out with some of my brand new A2 Paper! It's all set and ready, and just begging to add a little bit of shine to it. Check out my full process video below to see how this card came to life.
Using metallic flakes is a lot easier than anyone probably anticipates, and it's a lot of fun! It is a little messy, but I think it's worth it. The only things you need are the actual metallic flakes (there are many different colors & kinds!) and gilding glue! Gilding Glue is a slow drying glue, that allows these delicate flakes to stick to it perfectly & create some really neat looking shine & texture. Let's get started. Grab your paper! I choose this design from my A2 paper pack because it already had some pretty copper color in it, but I felt like I could bring it to life a little more.

One half of the paper has more blue & the other half has more pinks. You can see the metallic looking parts throughout the design. Here's where I want to add my metallic flakes to add some realism and dimension! Grab your gilding glue, and put it down on the paper wherever you'd like the flakes to end up.


Now is the tough part... you have to wait! I'd say to wait at least 10 minutes or so until the glue is part way dry. As I said above, the gilding glue is slow drying, so it takes a little longer. Once you see the glue turning a little clear, and is sticky when you touch it, you'll then add your flakes. I like to press them down a bit with my finger as well to make sure they are stuck to all the parts of glue.


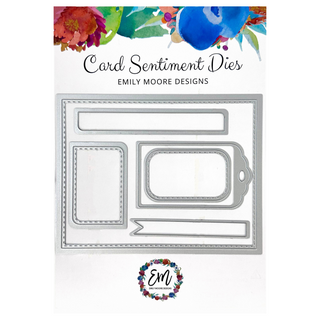
And then, you have to WAIT again! What!? haha, I sometimes feel like I'm an impatient crafter. So what I like to do in times of drying, is work on other elements of my card (or sometimes even another project all together!). This is where I worked on the sentiment for the front of my card. I choose the saying "can't wait to spend another year together" from my Birthday Sentiments Stamp Set. I love this saying, and the font is so cute, it has little hearts on it! I chose to stamp this in Sugared Lavender to go with the pink/purply/blue tone of this card. I then ink blended with Tranquil & It's A Girl to match the card look. I cut this out using one of the decorative rectangles from the Card Sentiment Dies. These dies coordinate perfectly with the Birthday Sentiment Stamps, but were made to coordinate with any stamps you have at home also!

Once some time has gone by, and you are sure your glue is dry, take a dry paint brush, and brush off the remainder of the metallic flakes off the paper. This will leave you with only the parts you added the glue to. I couldn't believe how amazing this turned out!


I completed the inside of my card using the A2 liner die from the Card Sentiments Dies, both on the top and bottom half of my card! This not only adds a little sturdiness, but can be used as cute decor, and the bottom half the perfect spot to write sentiments. I stamped the sentiment "celebrate good times!" because the font matched and I felt it could be used as any type of card with this saying (birthday or anniversary). I also ink blended here but used some more of the metallic flakes. Here, I put some of the glue down, then spread it with my finger. Then, I put the metallic flakes down immediately and rubbed them on to get a rustic, almost paint swatch type look. I love the effect this has on a card!


I love the way the metallic flakes really brought this paper to life. Have you ever tried metallic flakes?? What do you think you could use them for? Let me know in the comment section of my YouTube Video!


Thanks so much for reading and for all the support! Shop HERE for the cute stuff from Emily Moore Designs I used to make this fun colorful card :)
With Heart,
Disclosure: Compensated affiliate links may be used above at no cost to you. I only show you products from companies that I believe in and purchase from personally. Thank you for supporting me so that I can continue to bring you lots of fun crafting content!


