Hello my crafty friends! Today I am walking you through how to use transfer foil sheets to add a little shine to your card OR scrapbooking backgrounds! The type of foil I am speaking about is NOT one you need a machine for. In fact, this is a fun, inexpensive & simple way to add foil to your projects without any crazy equipment. At Emily Moore Designs, we now have everything you need in one simple kit to help get you started!
Our Foil Transfer Kit includes:
TCW Tacky-when-Dry Gel Medium:
In a handy 2 oz. jar! Tacky When Dry does just that. When it’s completely dry, it’s TACKY! Great for applying foil or gold leafing to a surface.
TCW Plastic Palette Knife (1 ct):
Cleans easily and can be used over and over.
Scrapbook Adhesives by 3L - Metallic Transfer Foil Sheets (Pastel Colors):
10 total foil sheets total, 6x6 to match the Confetti Layered Stencil perfectly. Colors come in Pink, Green, Blue, Yellow, Purple (2 sheets of each color).
I have a full YouTube process video below showing how to use this technique - I did this video a while ago, but everything in it still applies! I also have step by step photos below showing you exactly how to get started.
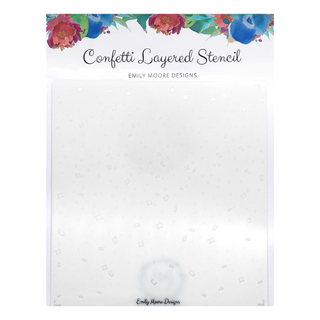
First, you will need the Foil Transfer Kit. What's nice about our kit is that you can grab it all in one place - and you might as well get the Confetti Layered Stencil with it! Check out below to see an ALL foiled background I created using our Confetti Layered Stencil. The 3 separate layers allows you to add different mediums, but also allows you to do 3 separate colors.
Step-by-Step Instructions
First step, grab your stencil. You will want a sticky mat or, you can just tape your stencil down onto your paper. Having your stencil taped down or secured with a sticky mat is helpful because it won't allow any lifting of your stencil. This is important when using something like Tacky-when-Dry gel, or even texture pastes.

What's nice about a sticky mat vs. just tape is that you also know your paper is secure, so it won't move underneath your stencil. I like to use the Misti Stamping Platform with their Sticky Mats, but I do like to have my card base cut down first when I use my sticky mats so like I said, my paper doesn't move around. Another note, if you are using a Misti Sticky Mat, you'll want to remove your cardstock before applying foil - as the foil will stick to the mat!

Now, grab your pallete knife. I love these plastic pallete knives because they are very easy to clean. You will want a good amount of the Tacky-when-Dry gel on your knife, but when spreading it, you want to try to get an even, thin layer - as this helps with drying time AND transferring of the foil more consistently.


After scrapping the top layer off to ensure it's as smooth and even as possible, look how much paste I have left on my stencil!

Once you have your layer on, remove your stencil right away & clean it right away! If you don't wash off the excess gel, it will dry sticky on your stencil. This doesn't ruin it, just makes it a little annoying for future use! I like to just rinse my stencils with warm water and use my hands or fingers to get the excess gel off, then dry with paper towel. Removing stencils by lifting off from one corner to the other ensures less movement, especially when using pastes.

Now back to the project! With Tacky-when-Dry Gel medium, if you don't wait long enough for it to dry, it won't stick to the foil. If your paste is still wet, you will want to wait longer for it to dry. On the other hand, if you wait too long (I find it will still work) but sometimes it can not stick as well. But there is a solution to this!

Make sure to remove your project off your sticky mat before applying foil!
I find that 10 minutes is about the right timing for the Tacky-when-Dry gel to dry "sticky"- or tacky, leaving the perfect surface for putting your foil down onto. It's important to get as even a spread as possible, if some areas are thicker than others, it obviously won't dry at the same time and you may need to wait longer to apply the foil. If you have an issue where you set it aside and waited too long to apply the foil, then you can "reactivate" the tackiness if needed by applying your heat tool.

Once your gel is to the right stickiness - (I like to test this by just using my finger and pressing on it - if it's sticky & no more wetness, it's ready!) you will now want to apply the foil! I get asked a lot which type of foil will work with this technique. Any thermal or toner reactive foil will do. Of course, TCW's foils work wonderfully since the Tacky-when-Dry gel medium is their brand, but I love Scrapbook Adhesives by 3L foils because it comes with several colors you can pick & chose from! Deco foil is also one that will work with the Tacky-when-dry Gel.

Make sure when applying the foil, you put this color-side UP. You want the back of the foil (the usually grey or silver area) down on top of your gelled area. Now, you just rub over the gelled areas with the foil on top with your finger. The heat from you rubbing will transfer the foil onto the gelled areas, leaving a super fun & shiny effect!

When ready, lift your foil off your project. If any spots are not transferred onto the background, you can simply go through and press some of the foil onto the spot with your finger. I find pressing helps to transfer to any unruly spots.


And that is the basics of how to use foil transfer sheets! You can grab everything you need to get started to day in our Foil Transfer Kit. As of now, it's on backorder, but we are expecting to be back in stock & shipping out next week.
I hope you all loved this technique - please let me know if you have any questions in the comment section below! Also, I'll be doing a live next Thursday (7/18) at 7 PM ET using our Foil Transfer Kit on Facebook so you can get all your questions answered then!
Happy Crafting!
Emily
Disclosure: Compensated affiliate links may be used above at no cost to you. I only show you products from companies that I believe in and purchase from personally. Thank you for supporting me so that I can continue to bring you lots of fun crafting content!


Andrea Robinson
Thank you gor explaining foiling system
Karen St.John
Can this be used with a stamp? I would like to stamp sayings on the inside of cards and foil them.
Patricia Velasquez
I love this process, thank you so much,