Hello friends! Nice to "meet" you! I'm Amy Solovay, popping in to do a guest designer post here at Emily's blog.

In this post, I am going to share a card making project with you; however, this post’s most important takeaway isn’t actually the card making idea, but rather, it’s a possible solution to a common problem that frustrates many stampers and aspiring stampers.

In discussions with other paper crafters at my craft website and on social media, one comment I’ve observed repeatedly is that people often make the mistake of buying stamps but then rarely using them. Then they get frustrated because they feel like stamp collectors rather than actual stampers. Some of them even berate themselves for having wasted so much money on stamps they want to use but aren’t using.
I used to have this problem, too, and I found a workable solution for it. I’d like to share this information in case my solution will help you get more mileage out of your stash of stamps, dies and other craft supplies.
This solution makes it super easy to incorporate stamped images into all the paper craft projects you might be interested in making, including handmade cards, scrapbooking layouts, planner layouts, collages, junk journal pages, mixed media art projects, and any other similar types of projects.
Another upside: If your current creative process has a lot of down time baked into it, like waiting for media to dry, this solution might also help you to improve your crafting efficiency.
I thought of this solution before die cutters were popularized, back in the days when fussy cutting everything was the norm. Now that we have die cutters, this solution is even easier to execute. And, in particular, I think you are going to be really excited to see how Emily’s lovely card sentiment dies make it a breeze to implement this solution!
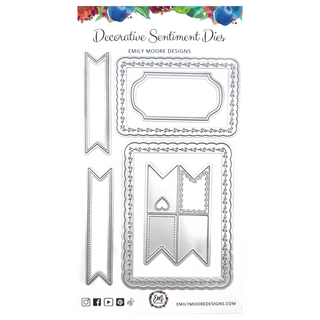
Have you seen these dies of Emily’s? I highly recommend them, and if you decide you'd like to have your own set of these to use in your paper craft projects, you can pick up your own set of them right here in Emily's shop.
I believe there could be multiple possible solutions to the problem I mentioned. I’ve stumbled onto one workable solution, but there could be others that are just as effective.
For example, you could begin your entire card making project by selecting a large focal stamp, stamping it onto white or light-colored cardstock, and then coloring in the stamped image. Then you could select and apply embellishments that would all enhance the stamped image. This is the approach many prominent card makers take. The results from this method can really be spectacular if you have the time and skill to do an amazing job at the coloring. So if you aren't already using your stamps this way, it's one possible approach you could try.
I don't usually approach my card making projects that way because before I was a card maker or scrapbooker or planner crafter, I was a collage artist. I therefore approach pretty much all my paper craft projects with the same mindset, and the same set of techniques, that a collage artist would use.
Think of these cards, for example, as little collages.

Any child who can be trusted with scissors and glue can make a collage. It is a really simple thing to do. So I believe that my approach to card making is much easier to succeed with than the method where you start with a large focal image that needs to be colored in -- because coloring beautifully takes substantial skill, but anyone can glue pretty bits of paper to a card base.
Stamped papers can be incorporated into this process, but that isn't essential -- and you can color your stamped images, or not. So if you choose not to color your stamped images, this approach to card making is relatively much quicker than the approach where you start with a large image that needs to be colored in.
How to Incorporate Stamping Into Your Paper Crafting Workflow
If you're a paper crafter who buys stamps with the intention of using them, but then you end up NOT using them, the issue might be that you haven't adjusted your workflow to accommodate stamping. In many cases, when crafters aren’t using their stamps, it’s because they have established workflows that don’t incorporate stamping into the process.
So I'm here to explain one possible way you could adjust your workflows in a way that incorporates stamping and / or die cutting.
A crafter’s workflow is a highly personal, individual thing. I'd like to emphasize here that nobody's crafting process is wrong. However, if your existing workflows don't incorporate stamps, but you want to use stamps, it makes sense to think that you'll have to make some adjustments to your workflow to fit the stamping in.
The backstory: I used to sell handmade collages and mixed media artwork in the years 2005 – 2010. Those art pieces were time consuming to create. I determined that I would never be able to sell my collages profitably if I couldn’t figure out how to streamline my process and make it more efficient than it was when I started out. So one of my primary goals was to think through how I could trim all the wasted time out of my creative process.
Part of my thinking, at the time: I wanted to incorporate more stamping into my artwork, because otherwise I was hand painting the collage elements I used. So you can imagine the time I saved by stamping rather than painting, once I figured out how to incorporate stamped imagery.
It doesn’t matter if you sell your projects or not; either way, this system works for maximizing efficiency when making paper craft projects that incorporate hand stamped images.
There are 3 main keys to success with this system:
#1: Think through your process to determine how you can separate and batch your workflows in a way that makes logical sense for the projects you want to create. I recommend structuring your crafting time so you’re only ever focused on one thing at a time; you don’t ever have to stop what you’re doing to do something else; and you only have to get out, clean up and put away one set of supplies at a time. This will help you to maximize your crafting time and get the most out of each crafting session.
As I already mentioned above, I personally approach card making, scrapbooking and planner layouts the same way I approach collage art. With this mindset, stamping and project assembly are two separate activities, both of which have very different workflows. They should be treated as such; it’s ideal to work on them separately.
If stamping and coloring are not already the primary focus in your paper crafting, you are likely to benefit from starting to think of your stamping and project assembly as two separate activities. The same goes for other mixed media-type activities: stenciling, ink blending, etc; consider doing each of these types of activities separately in batches.

#2: Be proactive about organizing your stamped images and storing them with your other supplies so that you can find them and use them as needed. So if you usually organize by color, put your stamped images in with other similarly colored supplies; if you organize by collection, organize your stamped images in with your other papers and embellishments from whichever collection the stamp set is part of.
Important Takeaway: At whichever point it is that you start grabbing supplies to use in your paper craft projects, your stamped images need to already be there for you to grab along with your store bought journaling cards, washi tapes, stickers, enamel dots and other supplies.
#3: Structure your workflow so that you stamp / die cut and organize the resulting images before you assemble projects. This way, you’ll ensure you have a lovely variety of stamped and die cut images to incorporate into your projects.
If you do these three things systematically, you are likely to get a massive amount of use out of your stamps -- and your dies, too.
Die Cutting Your Stamped Sentiments and Images

Now let’s talk about how die cutting fits into the creative process. For me, die cutting is a relatively new introduction to my workflow; I got my first die cutter a little more than a year ago. It has been a game changer! My projects look so much better now than they did when I was fussy cutting everything. Fussy cutting still has its place, and I still do a fair amount of it, but I am glad to have the option of die cutting, too.
For the way I work, it makes sense to stamp, die cut and organize the cut out images all in the same session. These workflows are all compatible with each other, and I don’t feel that I’m wasting time by batching them together. But there are cases where it could make sense to separate these activities and keep those workflows separate. If you do a substantial amount of elaborate coloring, it might make sense for you to separate your stamping from your coloring and die cutting and do them in different sessions. If you frequently use layering dies, it might benefit you to separate your die cutting and your stamping sessions.
How I’m Using Emily Moore’s Card Sentiment Dies to Get the Most From My Existing Craft Supplies Stash
I’m a longtime paper crafter with a massive stash of older stamps that do not have corresponding dies. Either dies were never made for these stamps in the first place, or I bought the stamps but failed to buy the corresponding dies (because I didn’t have a die cutter at the time of the original purchase).

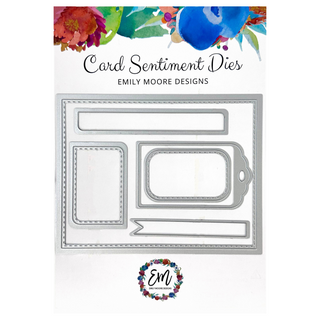
Emily’s Card Sentiment Dies are a lifesaver in situations like this because they give you a logical, useful, intuitive and easy way to cut out a variety of stamped images where you don’t have the corresponding die. And even in cases where you do have the corresponding die, these Card Sentiment Dies give you a bunch of other options for cutting out your stamped images in different ways. This expands your possible options and allows you to get a lot more use out of your existing stamp sets.
Here you can see a grouping of die cuts I made using Emily's Card Sentiment Die set. I stamped most, but not all of these images; some of the images were cut out using interesting bits from patterned papers. I don’t have the coordinating dies for any of these stamps – but as you can see, I was still able to die cut them, because Emily’s dies are the PERFECT sizes to use with them.

Of course, this is going to be hit and miss; I do not promise that you’ll be able to find an exact match for every stamp in your stash. However, I was pleasantly surprised at how many close matches I was able to find when I started pairing up my stamps with Emily’s dies.
I have also been having a lot of fun with using the dies to make deliberate choices about which parts of the designs to cut out when I’m working with patterned scrapbooking paper.

Yesterday morning, as I was putting these images away in my organizer and working on writing this blog post, I had a light bulb moment. I realized something the rest of you have probably understood for years -- and that is, if you have a die cutter, some fantastic dies, and some beautiful patterned papers, you really don't need to spend a lot of time stamping. You can just find interesting spots on your patterned papers to die cut, and then organize the images in the same way you'd use stamped + die cut images.

I made the following cards with images I die cut using Emily’s Card Sentiment Dies -- but most of the images in these cards are die cut but NOT stamped.

When you have a bunch of pretty bits and pieces to work with, it is so much easier to create beautiful projects!
So in this post, I'll leave you with step-by-step instructions for the one card in the bunch that incorporates stamping.

Tools and Supplies You’ll Need for Creating One or More Cards Like This Example:

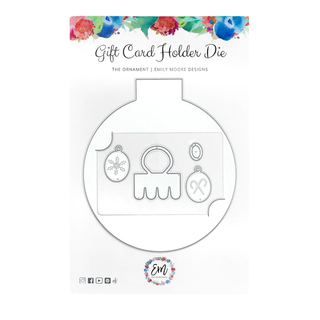
- Emily Moore's Card Sentiment Die Set and Gift Card Holder Die plus a die cutter. Please note: My pics show a compact die cutter, but you will need a bigger die cutter if you want to die cut gift card holders to use inside your cards.
- Sentiment stamps: I've used a sentiment from the Togetherness clear stamp set by Hero Arts.
- Ink pads: Use ink that complements the colors of your patterned papers. For this project, I used Tim Holtz Distress Ink in the Tea Dye color.
- Small, three-dimensional faux flowers; if you don't already have suitable flowers stashed, check out Graphic 45's Flower Assortments and also 49 and Market's paper flowers, which are the two types of flowers I've used to make the cards pictured in this post.
- Patterned Papers for making your card fronts; I made these cards using papers and imagery from Graphic 45’s PS I Love You collection, but this idea will work with many patterned papers. You might want to check your stash to see if you have suitable designs you could use for this.
- Plain white or solid-colored cardstock for creating your card base(s); I used plain white cardstock by the Neenah Paper Company to make the example card.
- A scoring board or scoring tool; I use a Scor Pal tool for this, but you could also use a bone folder or other similar tool.
- A paper trimmer and scissors
- The paper adhesive of your choice
Step-By-Step Instructions for Creating Cards Like This One:
If you're sitting down to make cards, to my way of thinking, it's smart to make more than one card at a time. So these instructions will help you make multiple cards; if you only need one card, you can add any extras to your card stash, and they'll be handy later when you need them.
Stamping is one of the easiest ways to make your own card sentiments. To start, I recommend choosing a card sentiment stamp, an ink pad, and Emily's Card Sentiment Dies. If you have a card positioning system, you'll want to use it; and if you don't, you can attach your sentiment stamp to an acrylic block and stamp your sentiments by hand.
You waste less ink and less time if you stamp multiples of the same image, so that is what I typically do. I recommend stamping your sentiment a dozen times and then cutting out each stamped image.
You can further embellish the stamped image if you like. I usually ink around the edges with an ink pad in a color that coordinates with the color I've used to stamp my sentiment.
It might take your ink awhile to dry, so put your inky sentiments in a safe spot where they will not be disturbed by pets or anyone else.
For my workflow, I usually just stamp in a single session and then assemble cards in a separate session, but whether you do it that way is, of course, up to you.
When you're finished stamping, clean up all your stamps and put them away. If time will elapse in between your stamping session and card making session, also be sure to organize your stamped and die cut images with your other craft supplies.
Then when you're ready to assemble your cards, proceed with the next steps:
My example card is an A2-sized design that's intended to fit a gift card holder inside. So for each card you want to make, die cut a gift card holder using cardstock or patterned paper plus Emily Moore's Gift Card Holder die.
For each of your card fronts, you'll cut one rectangle of patterned paper measuring 5 1/2" by 4 1/4", and a second, smaller rectangle in a contrasting color measuring 5" x 3 3/4". Ink around the edges of all these rectangles with a coordinating ink color to add visual interest. Then set the pieces aside in a spot where they will be undisturbed while the ink is drying, and move on to the next step: creating the card bases.
For each card base, cut a piece of patterned paper measuring 5 1/2" x 8 1/2". Score and fold down the middle so you end up with a card base measuring 5 1/2" by 4 1/4".
Attach your gift card holder shape inside the card.

On the outside of the card, layer your two rectangles of patterned paper on top of each other, and attach them to the card front. Grab a die cut sentiment from your organizer and attach it to the card front.
Finish by layering a grouping of three-dimensional flowers over the sentiment and the patterned paper. On this particular card, I used 5 of 49 and Market's paper flowers and two of their matching leaves, but you can use whichever flowers you happen to have on hand. It's also possible to die cut your own flowers if you don't have any premade flowers in your craft supplies stash.
If you have a recipient in mind for your card, personalize the card and carefully place your gift card inside it. It's ready for giving.
If you don't have a recipient in mind for the card, add it to your card stash; you'll thank yourself next time you need a card and you don't have to scramble to make one.
Find A Couple of Other Similar Card Making Ideas:


So far, I've made 3 different wedding cards using Emily's Card Sentiment Dies, two of which also utilize the Gift Card Holder Die. I have an overview with more information about these projects posted at my personal blog:
In the next few days, I will be posting free step-by-step tutorials for the other two wedding cards in the blog at my craft website, knittingcrochetcrafts.com. I hope you'll check them out.
Update 12-21-2023: the other two tutorial posts are both live! Here are direct links to the new pages:
So there you have it: That’s how Emily Moore’s Card Sentiment Dies can help you get the most out of your craft supplies stash.
We have commenting turned off on this blog post, but if you have questions or comments, please feel free to leave a comment at either of my blogs, where commenting is enabled (but moderated, so please forgive me if it takes some time for me to publish your comment.) If you try any of the ideas mentioned above, please let us know how it works for you. Or if it doesn’t work for you, let’s talk about where you’re getting hung up? Or if you have other ideas on this topic, please share them. I'd definitely be glad to have the insights, and I'm sure everyone else here would be, too.
If you're on social media, it's also an option to check with us on Instagram. Emily and I have both posted about these projects there, and you can feel free to drop either of us a comment and let us know what's on your mind. If you're already an Instagram user, I invite you to follow me over there; I'm @amysolovay on Instagram.
If you’d like to try using Emily’s dies for your own projects, you can find her gift card holder die HERE and her card sentiment dies HERE. I really hope you'll give them a try! I think you're going to love them!
Thanks for dropping by Emily's blog today! We really appreciate your interest in our projects.


