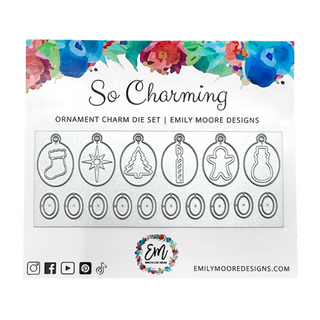
Hey everyone! I'm very excited to introduce Sabine with her very first blog post & YouTube video! Sabine made this card just for fun & I knew we had to turn it into a blog post because I knew all of you would love it just as much as I do! Today, Sabine is sharing how to make a Zig Zag Fun Fold Card mainly featuring our Ornament Nested Die Set.
You can shop all of the products used here: Shop Collection
Below you will find a full process video with Sabine walking you through the entire process. Be sure to keep scrolling to see more photos!
First, let's begin with what you need! You will need an A2 Vertical Card Base & an A2 sized Card Panel (shown below in the kraft paper):

Now let's talk about the actual zig zag portion! Starting with an 8.5 x 11 sized white cardstock, on the short side, trim at 4.25 inches (straight down) just like you would for an A2 card base.
Score on one short side at 1/2 inch in. This will become a flap. On the opposite side of the paper, using a pencil, mark the paper at 1/2 inch width in (on the short side).
Now you will trim from the top to the bottom (1/2 inch width) diagonally.

Score the zig zag portion at 4 inches & 7.5 inches (from largest side to smallest). Then you can fold each portion! From the short side in: mountain, valley, mountain. The flap will fold down (mountain).
Time to adhere onto our card panel! The panel will be 5.5 x 4.25 inches exactly, this way we can glue this onto our A2 Card Base with the illusion it's all attached.

As you see above, the flap on the zig zag fold we just created with go underneath the A2 card panel. Then, the card panel, now including the zig zag portion will get taped to your A2 Card Base (shown below)!

Now is time for the fun part! Decorating your card!
Trace the portions of the zig zag fold with some pattern paper you'd like to add as a background to both sides.
Sabine then cut out 8 small ornaments (6 for the front & back of the panels), 1 medium ornament & 1 large ornament from our Ornament Nested Die Set to decorate the card with.
 Silver Lining Lunar Paste comes in handy for the toppers of these lovely ornaments. Sabine also used the small "for you" that fits perfectly on that tiny ornament in the set!
 Now, she goes through & layers the ornaments, trims where necessary & add the tiny ones front & back to the zig zag portion.

I just love the layering effect of this card with our ornaments! The medium sized ornament came into play on the right side of the card.
 But remember, Sabine adhered this entire thing onto an A2 card base, so you can open it up! For the inside, Sabine used the largest ornament in the set. Even with it being too large, she positioned it diagonally & trimmed the bottom for a really lovely effect.

If you can believe it, that beautiful banner is handmade by Sabine by using our large & small banner in the Decorative Sentiment Die Set! You'll have to watch the video to see how neat that trick is.
 The other side of the card features a beautiful scene from this paper pack that Sabine cut out using the A2 Liner Die. There's even enough space to write.
 This card turned out so wonderful. Don't be intimidated by the different folds. I'd love to know if this is a card you're going to try to recreate! Let us know in the comments!
Also, feel free to congratulate Sabine on such an amazing first blog & YouTube video! Thanks Sabine!!

Here's another one Sabine made in red & green colors:


Magali Garcia
I really like the card, and I will like to thank you for sharing your design.
Sandy Wood
Thank you for the written tutorial. I tried this watching the video and had to stop it multiple times to figure out the measurements. I love the design you made Sabine keep challenging us. Great job EM designs group.
Brenda Zabowsky
I loved the card video. Sabine did a great job, clear and precise instructions. A friend of mine who is also a fan is coming over tomorrow and we are going to working on making a few.
Bonnie Sattur
The cards are beautiful, and the written instructions are a wonderful guide!
Peg Jarzynski
Beautifully done! The written tutorial is awesome. Happy cardmaking!!!